Elasticache Cluster on AWS
Documentation for Creating Elasticache Cluster on AWS
Step 1 :
Go to AWS console search for the Elasticache and go to the console of Elasticache in that create a redis cache cluster
Step 2 :
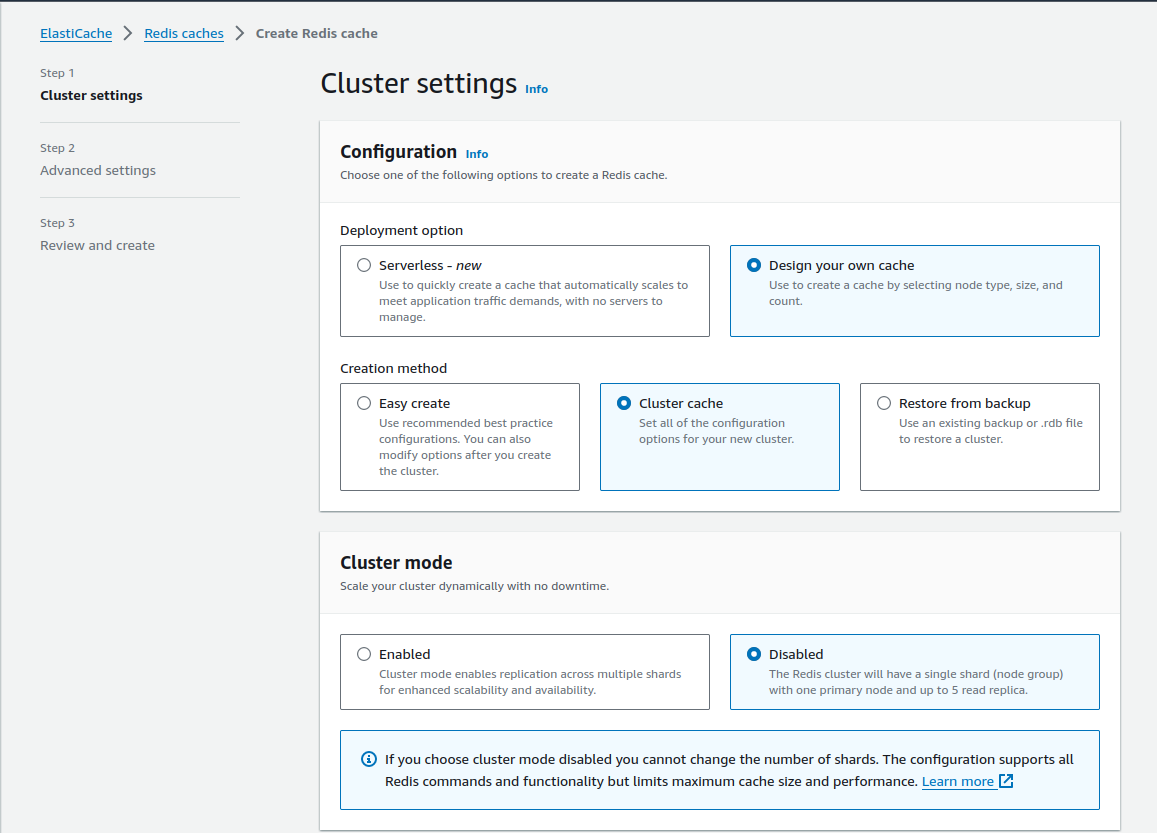
Select the Options in the cluster as shown in below image :
Step 3 :
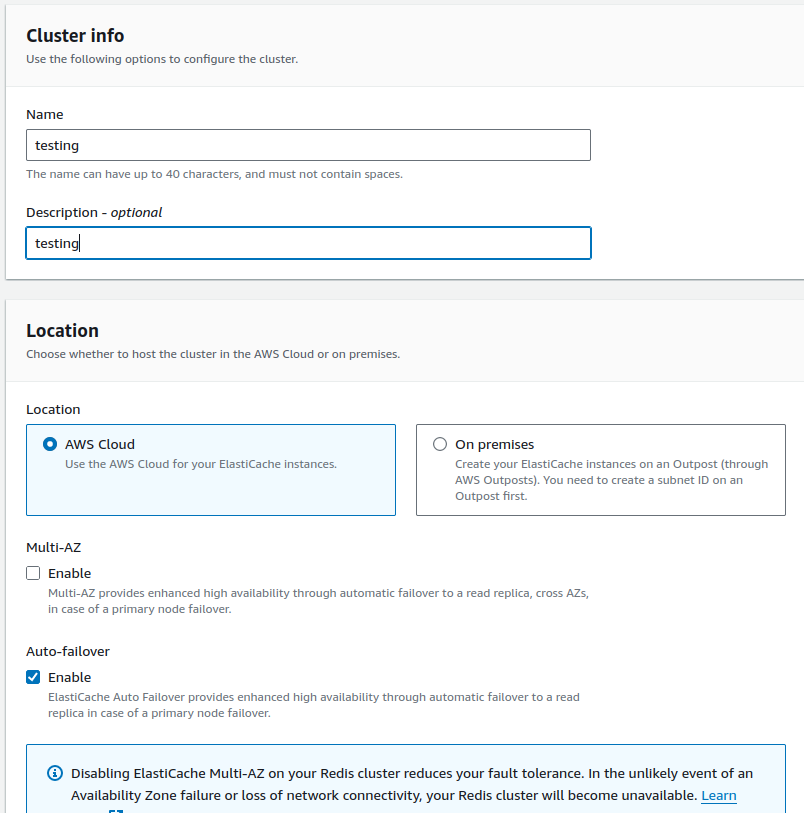
Fill the details and take a locations as AWS cloud
Step 4 :
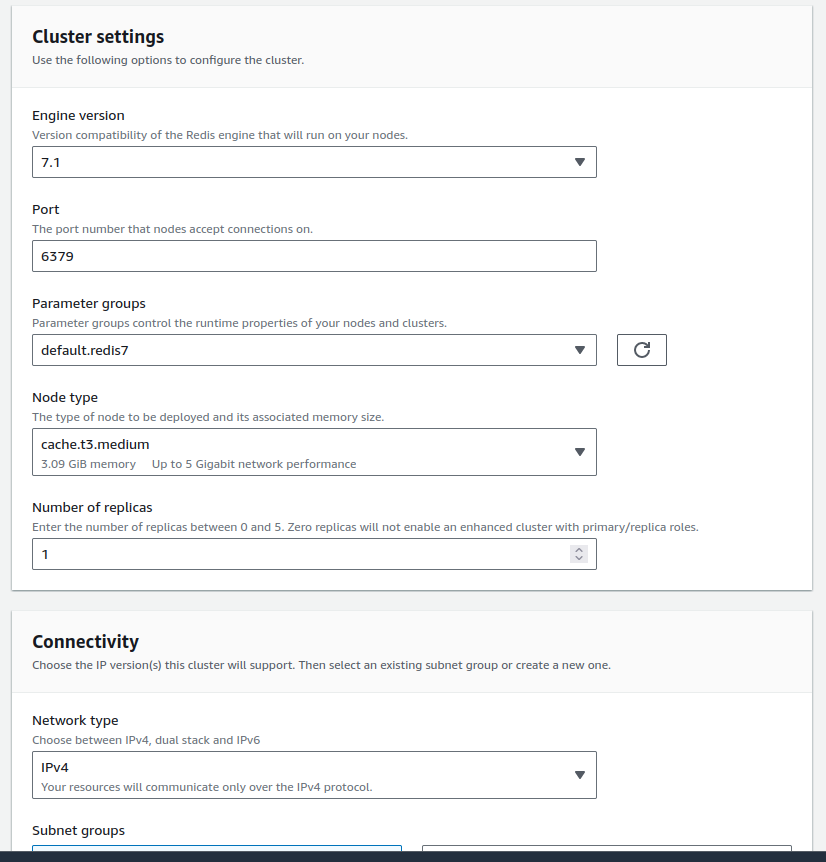
Fill the Details as the engine version, port, parameter groups and Node type (Select as per your requirement) and Number of replicas (Select as per requirement) as shown in following image :
Step 5 :
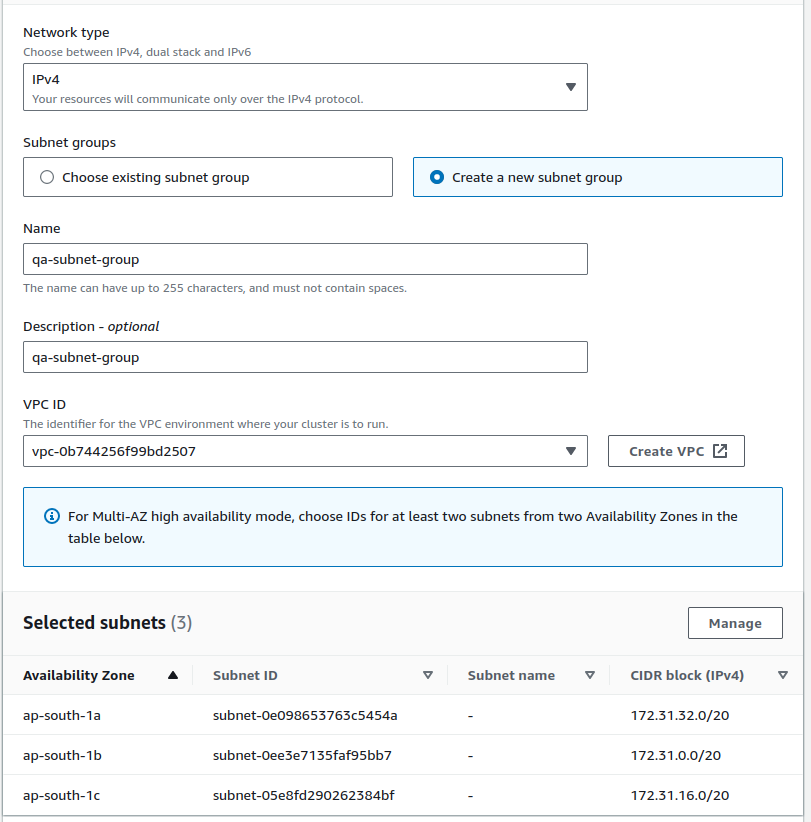
In connectivity create a new Security group in the default VPC make sure that you have more than 2 availability zones in the VPC as shown in below images :
Step 6 :
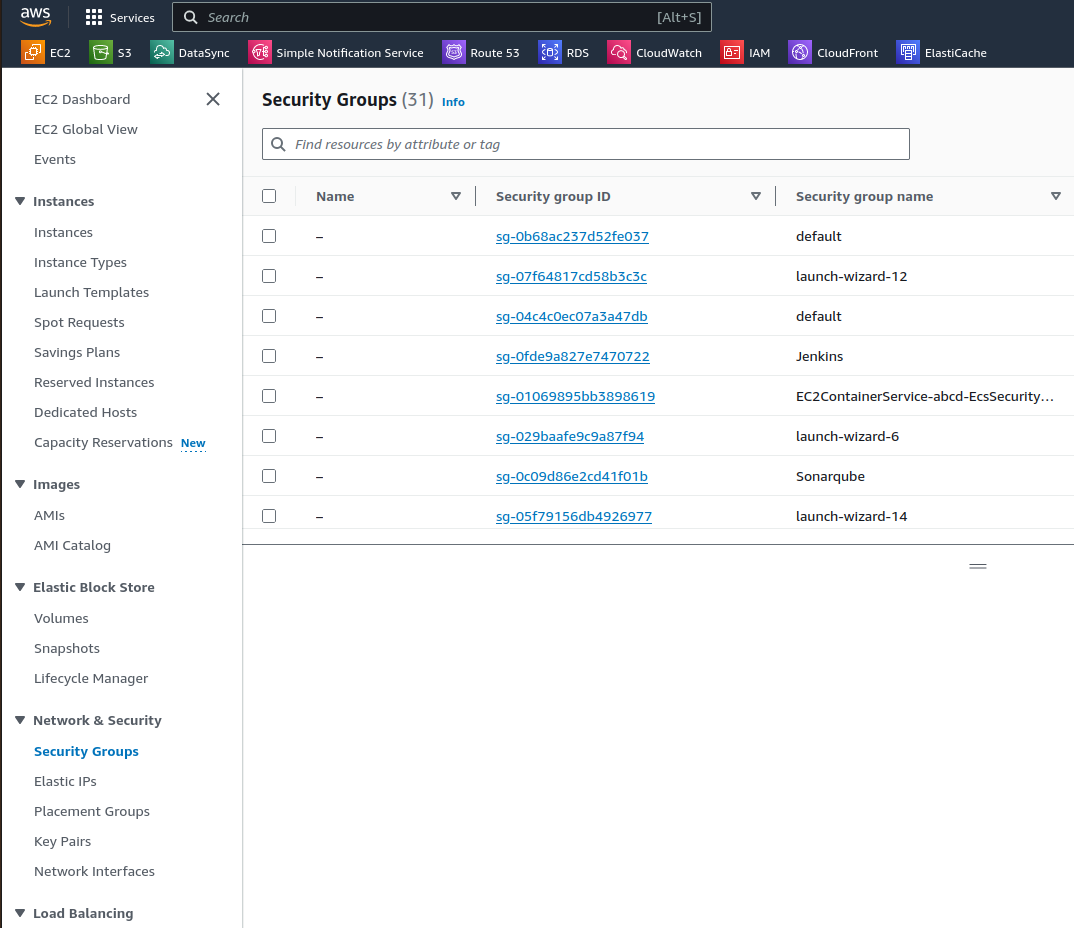
Now you have to create a new Security Group for the cluster so for that go to the Elastic compute cloud (EC2) console and under Network & Security click on the Security Groups and Create new Security group as shown in below image :
Step 7 :
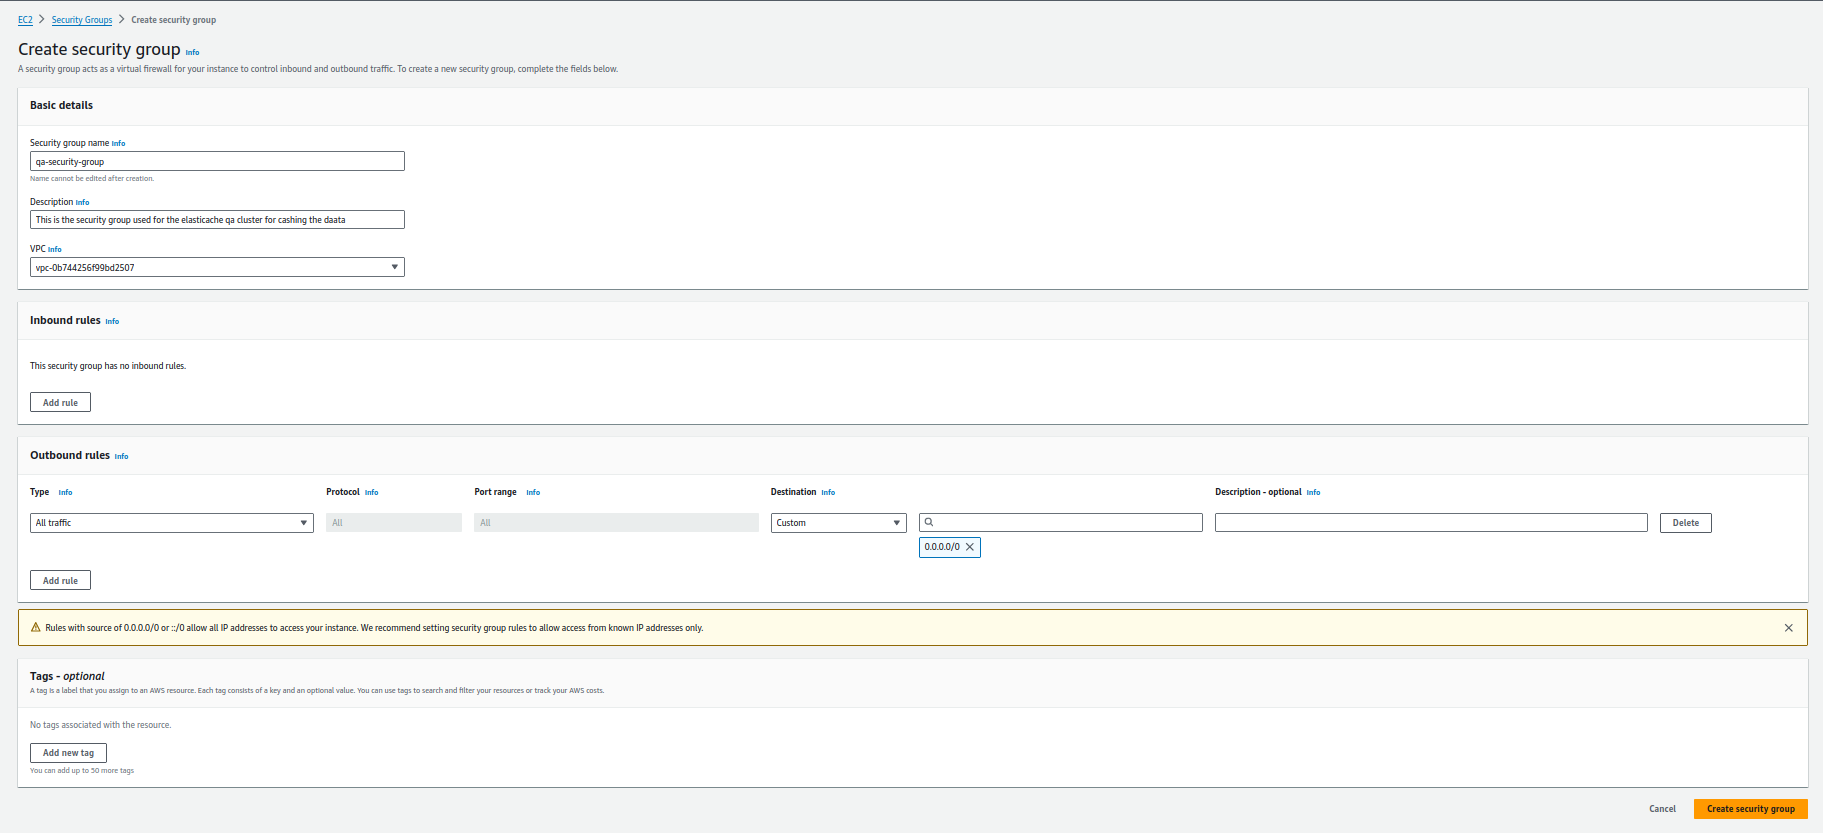
Then fill the details like the Security group name, description and make sure that you are creating a security group in the same VPC that you have selected for the Elasticashe cluster creation as shown in below image :
Step 8 :
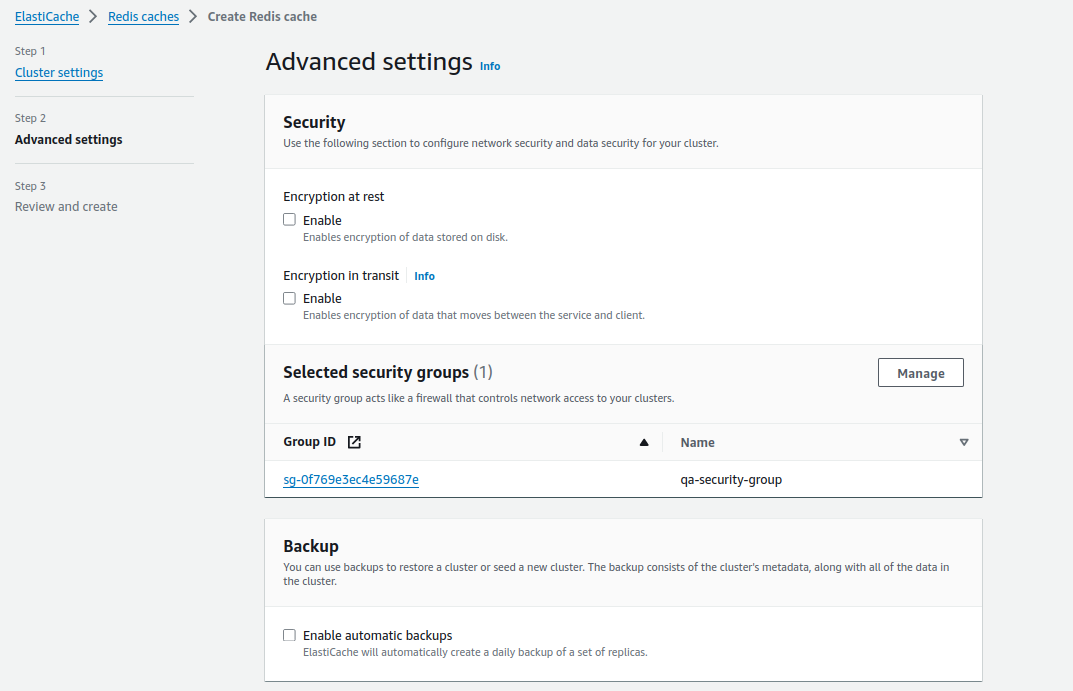
Now go back to the elasticashe cluster creation and in Advance security go to select security group click on manage and refresh the security groups and select the Security group we have created now as shown in below image :
Step 9 :
Make the setting as default or you can deselect Enable automatic backups and other setting to save some cost in the cluster creation and click on next after reviewing the cluster configurations click on the create so it will take few minutes to create a cluster and wait for the cluster status be up and running
Step 10 :
Once your cluster is up and running you can able to find the below endpoints in the cluster
* Primary Endpoint
* Reader Endpoint
* ARN (Amazon Resource Name)
Step 11 :
Go the EC2 console and Launch a new Server which is a main resource to access your redis cache for launching an instance you will get detailed information here :
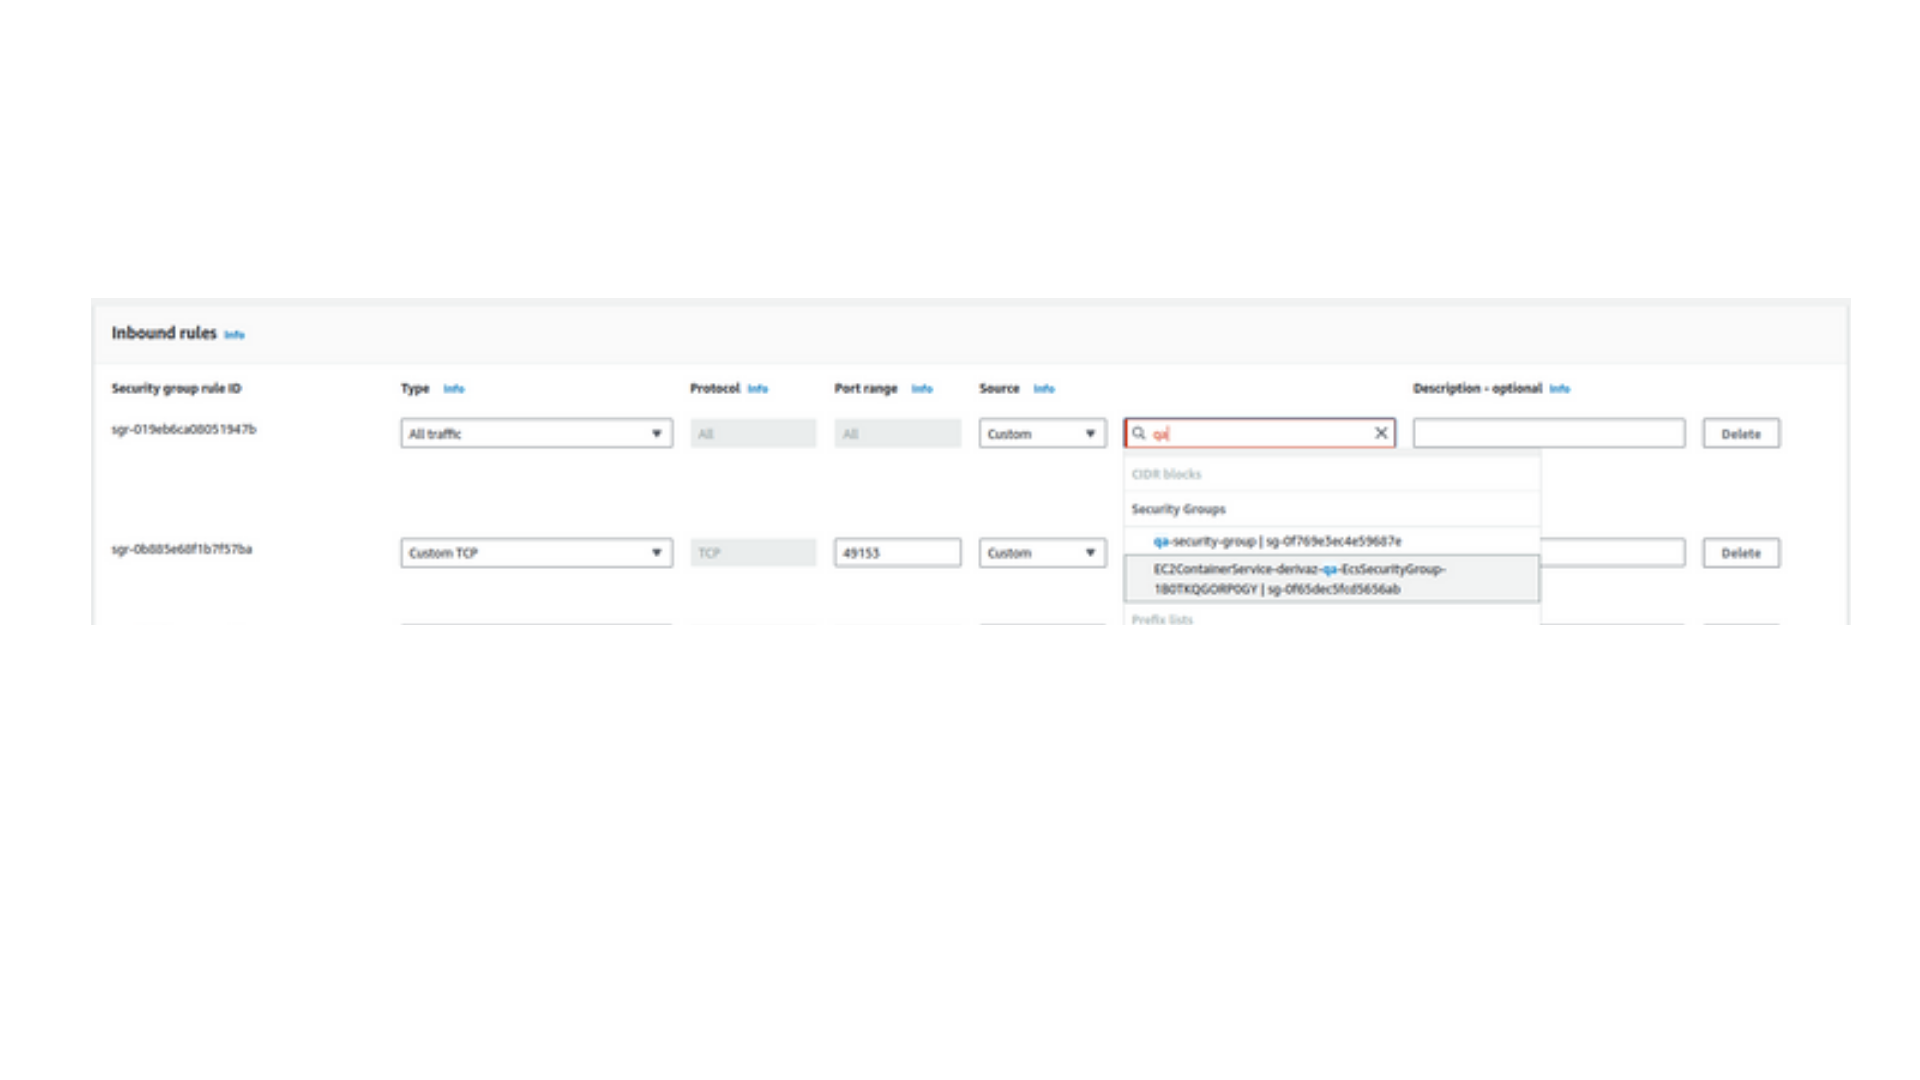
But while launching the instance you need to add a rule in the security group of an Instance that you need to route all the traffic from inbound to a Security Group redis Security group from there you will be able to access the Redis cluster. You can set the rule in security group as shown in below image:
Step 12 :
Once your cluster is ready go to the Security groups in EC2 and go to the Security group used in the cluster. In that Security group add one rule as below with mapping to all traffic to the Security group of the instance you are using to connect to the Elasticache cluster. For that refer below image : (See the rule no.3)

After that Login to a EC2 server with SSH with below command :
ssh -i <.pem> <username>@<DNS/IP of the server>
Once connection is established then exit the server login and then run the following command :
ssh -i <.pem> -f -N -L 6379:testing.hxrdzy.ng.0001.aps1.cache.amazonaws.com:6379 <Ec-2-user>:<DNS/IP of the server>
After running this command you will get below output as :
bind [127.0.0.1]:6379: Address already in use channel_setup_fwd_listener_tcpip: cannot listen to port: 6379 Could not request local forwarding.
Step 13:
Now login to the server again using .pem file and ec2 user with IP or DNS you can refer to the command as mentioned in step no. 12 and then install below packages :
For Linux server
sudo yum install telnet
For Ubuntu Server
sudo apt install telnet
After installing packages run the below command to check the connections :
telnet testing.hxrdzy.ng.0001.aps1.cache.amazonaws.com 6379
And you will get below output as connection is established :
Trying 172.31.10.186...
Connected to testing.hxrdzy.ng.0001.aps1.cache.amazonaws.com.
Escape character is '^]'